Help
1. Concept: Models & relationships
a. People
- A person can have 1 biological father (1 person, based on father_id)
- A person can have 1 biological mother (1 person, based on mother_id)
- A person can have 1 set of parents, biological or not (1 couple of 2 people, based on parents_id)
- A person can have 0 to many biological children (n people, based on father_id/mother_id)
- A person can have 0 to many partners (n people), being part of 0 to many couples (opposite or same biological sex)
- A person can be part of a couple with the same partner multiple times (remarriage or reunite)
b. Couples
- A couple can have 0 to many children (based on parents_id as a couple or father_id/mother_id individually)
- A couple can be married or not, still together or separated in the meantime
2. Authentification, multi-tenancy and data accessibility
a. Users

Users can register themselves.
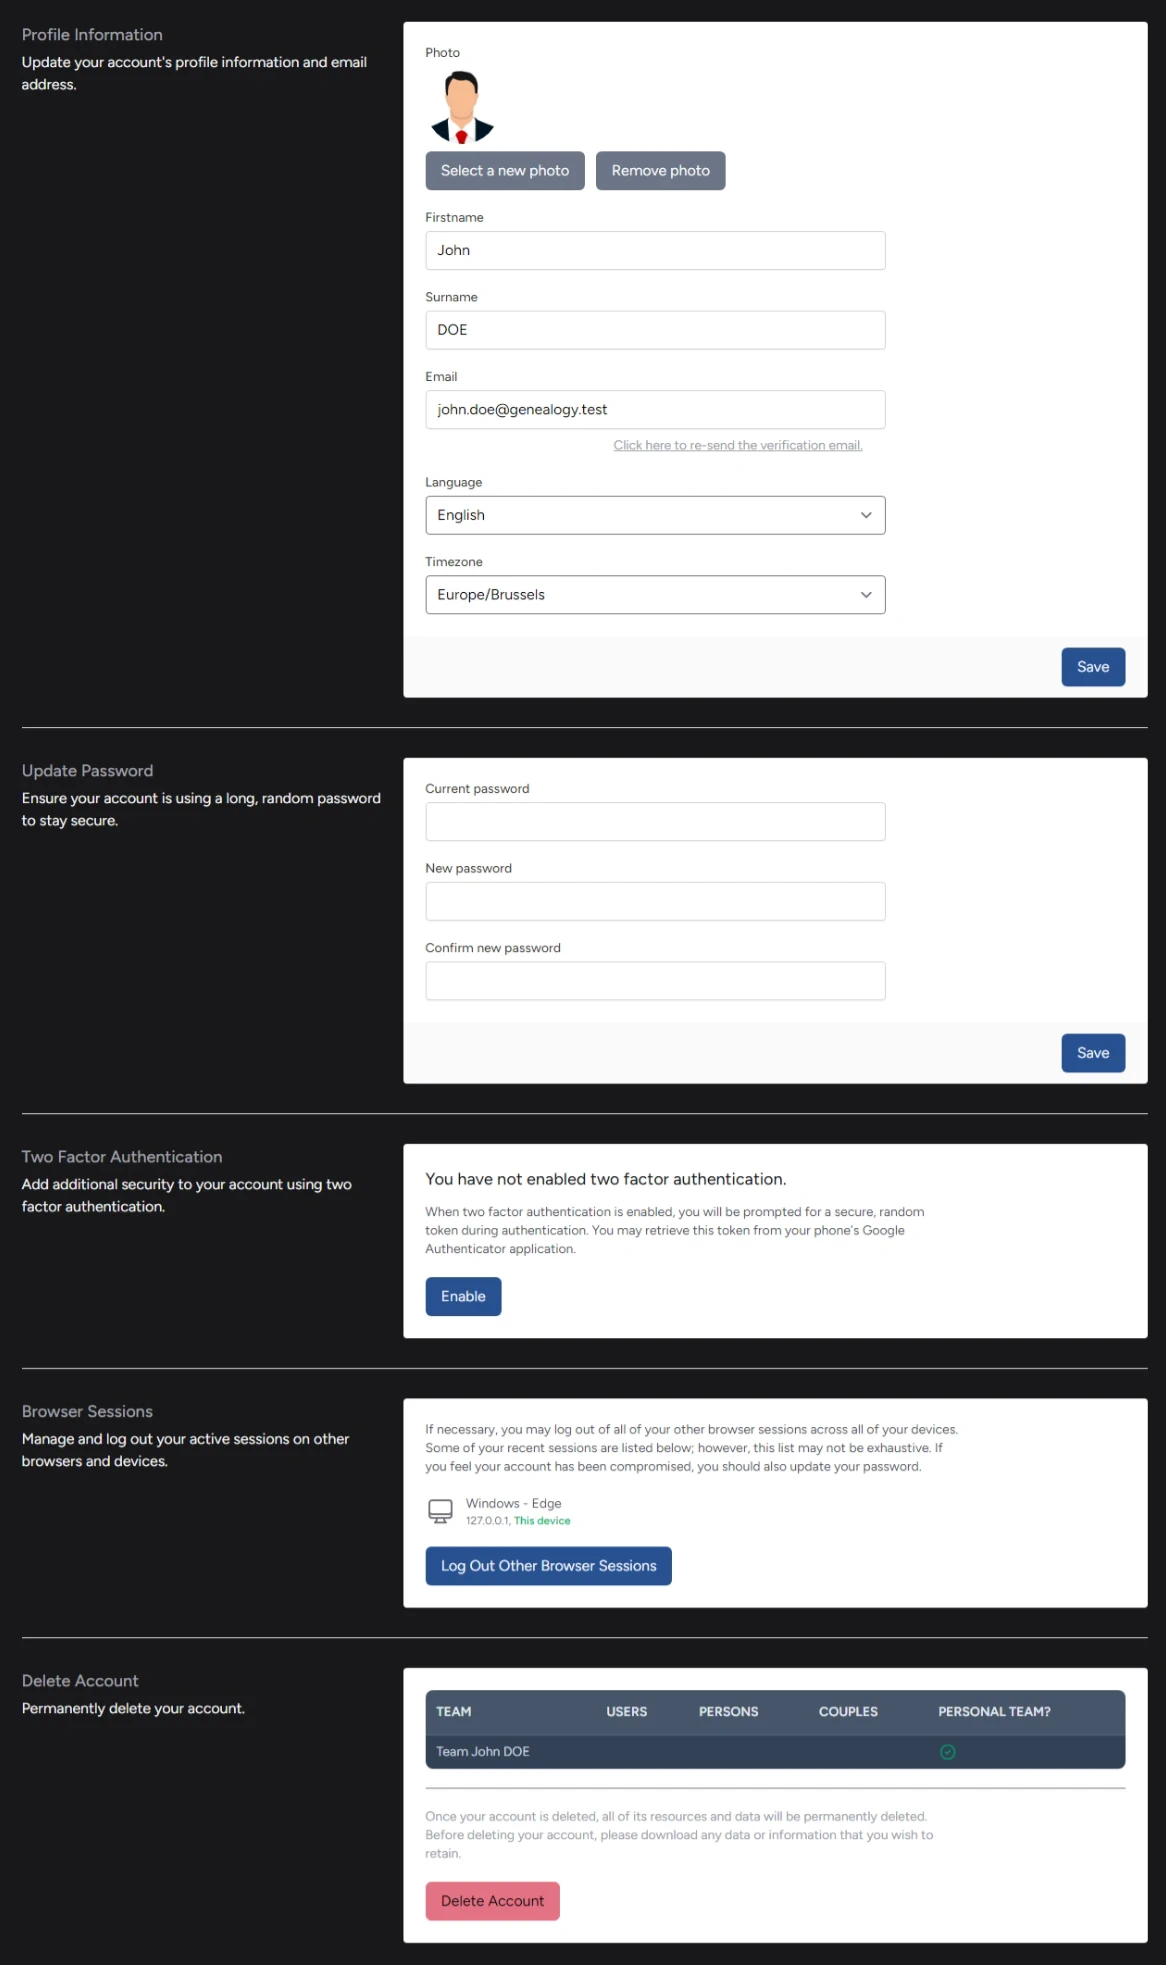
At least a surname, a valid e-mail address, a language, a timezone and a password are required.
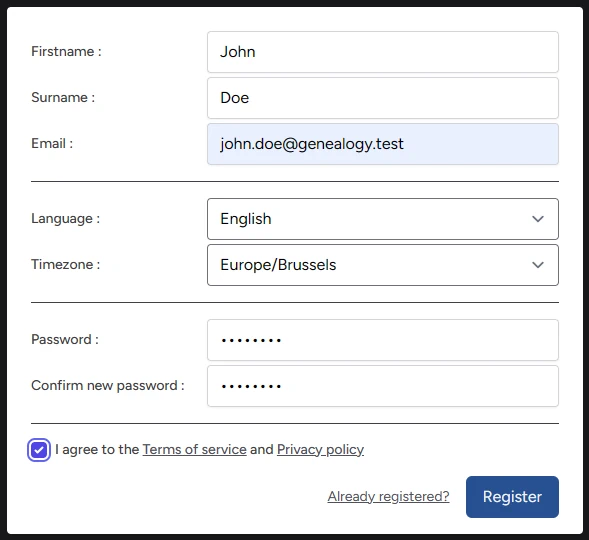
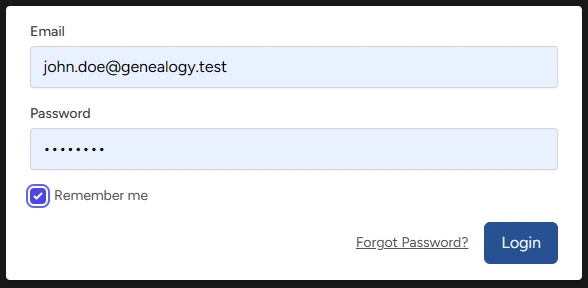
After registration and optional e-mail verification, users can login.
Authenticated users, without invitation, by default belong to (and own) their own personal team.
New users, after accepting an invitation by email from another user and registering, by default will be logged in to the team they were invited to. Those users by default also have their own personal team at their disposal.

Two Factor Authentification (2FA) and E-mail Verification can be enabled and configured in config/fortify.php.
b. User account and profile
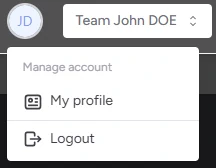
Authenticated users can manage their account and user profile by using the dropdown menu in the top right-hand corner of the menu bar.
c. Teams
This application uses Laravel Jetstream with the Teams option to implement and enforce multi-tenancy.
Authenticated users can manage their teams and teams settings by using the dropdown menu in the top right-hand corner of the menu bar.
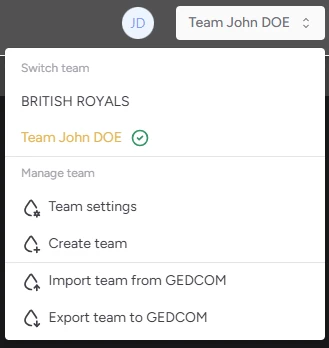
Users can manage either their personal team or create new teams.
The personal team and all teams created by a user are also owned by that user.
Only the owner can invite other (new or already registered) users (by e-mail) to join the owned teams.
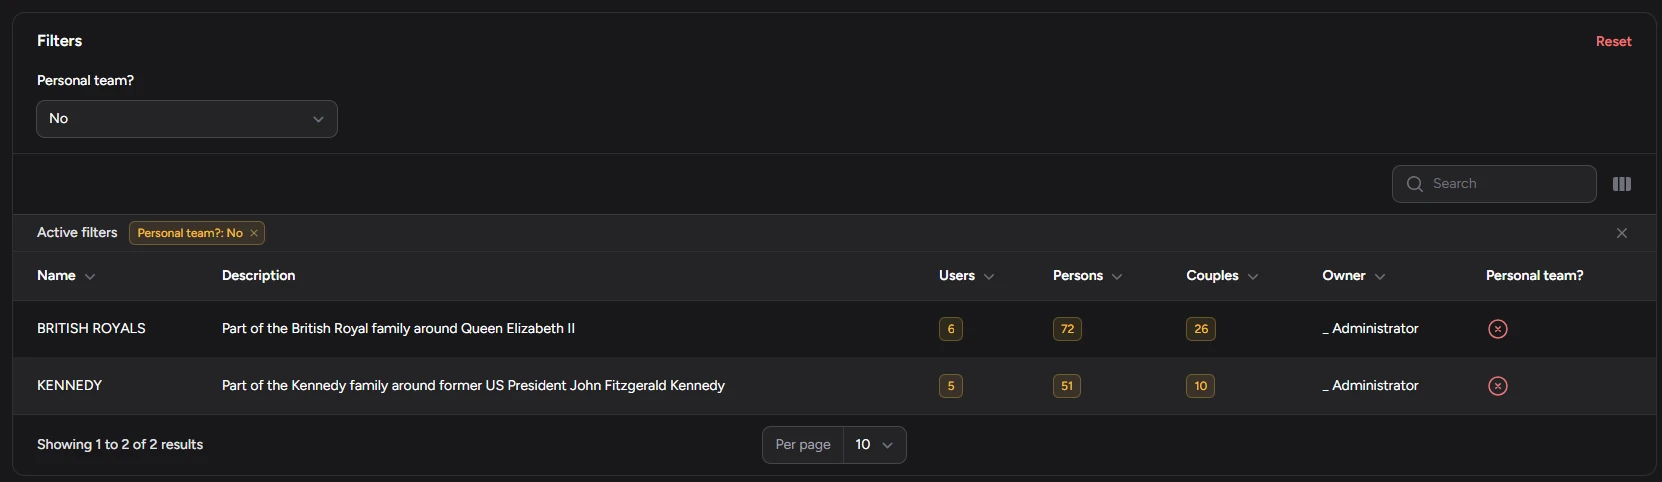
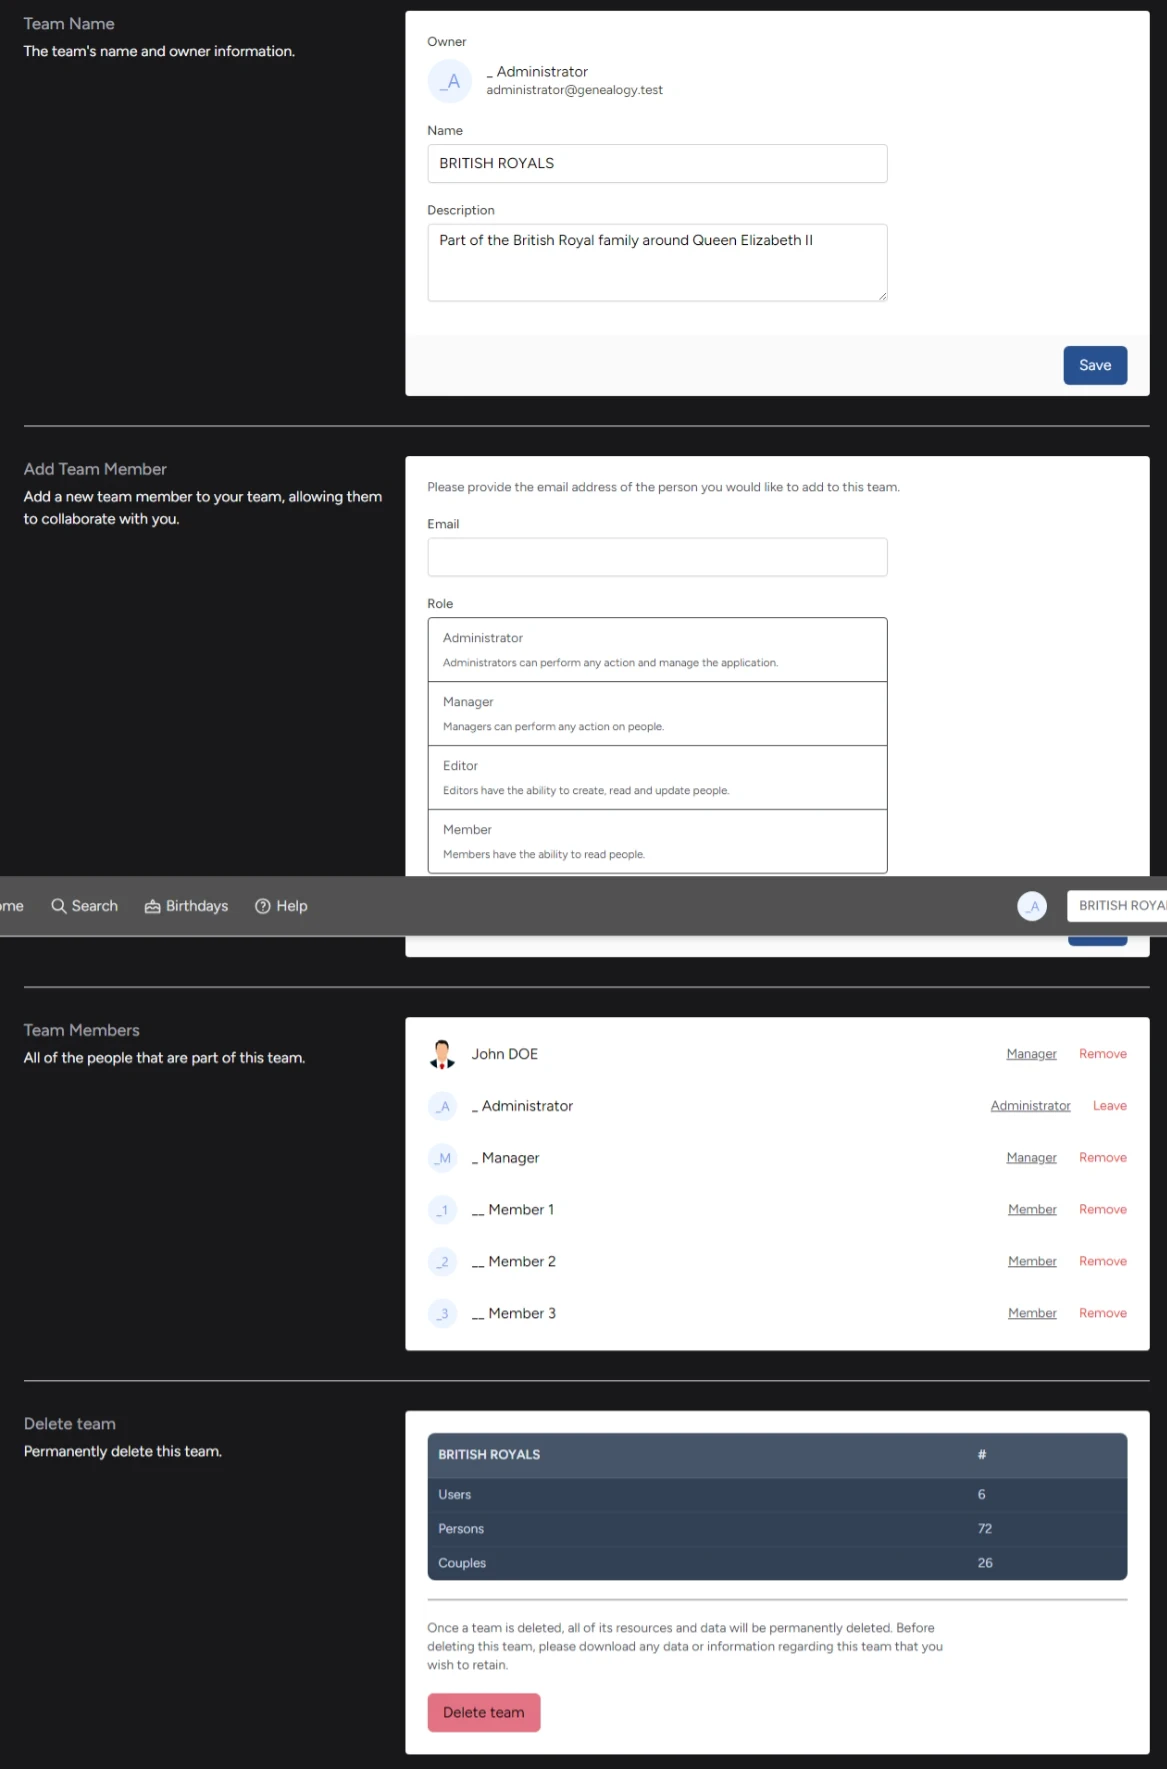 Create a new and seperate team for each family tree you want to manage and invite other users to it.
By assigning users the proper role you can define the rights they have in the selected team.
Authenticated users can only see people and couples:
- created by the teams they own
- created by the teams they were invited to by the team owner as administrator, manager or editor or member
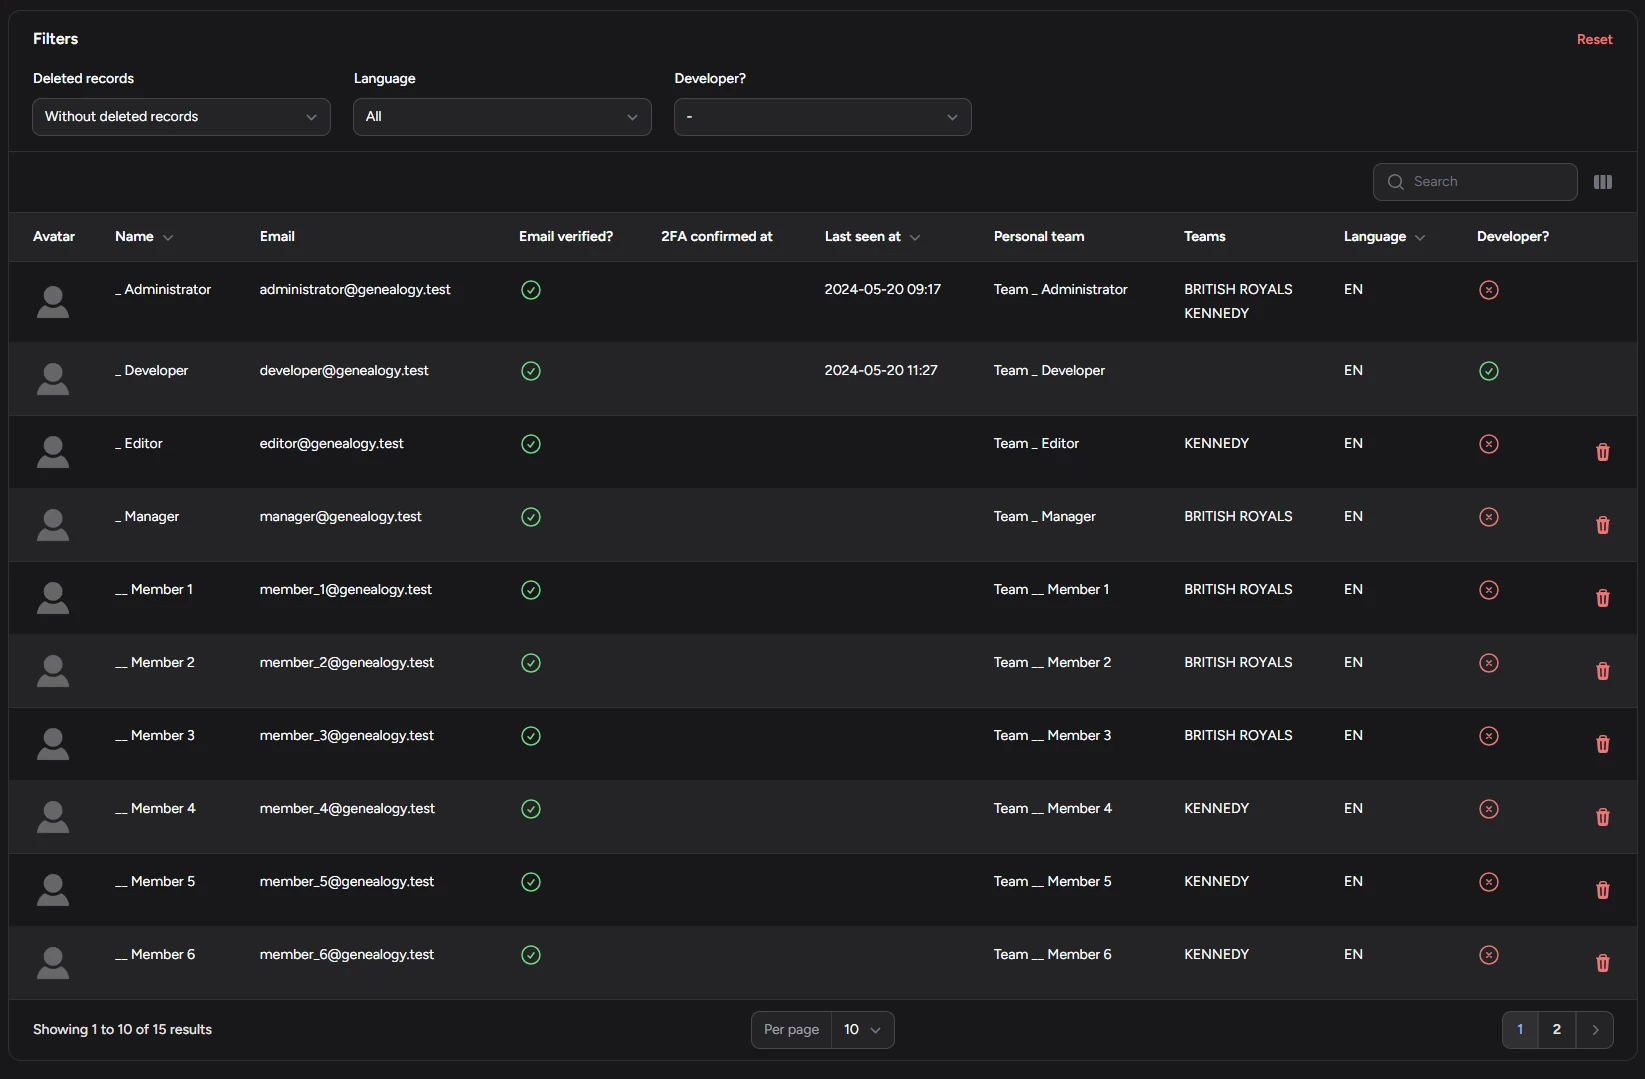
d. Roles & permissions
| Role | Model | Permissions |
|---|---|---|
| Administrator | user | create, read, update, delete |
| person | create, read, update, delete | |
| couple | create, read, update, delete | |
| Manager | person | create, read, update, delete |
| couple | create, read, update, delete | |
| Editor | person | create, read, update |
| couple | create, read, update | |
| Member | person | read |
| couple | read |
3. Search

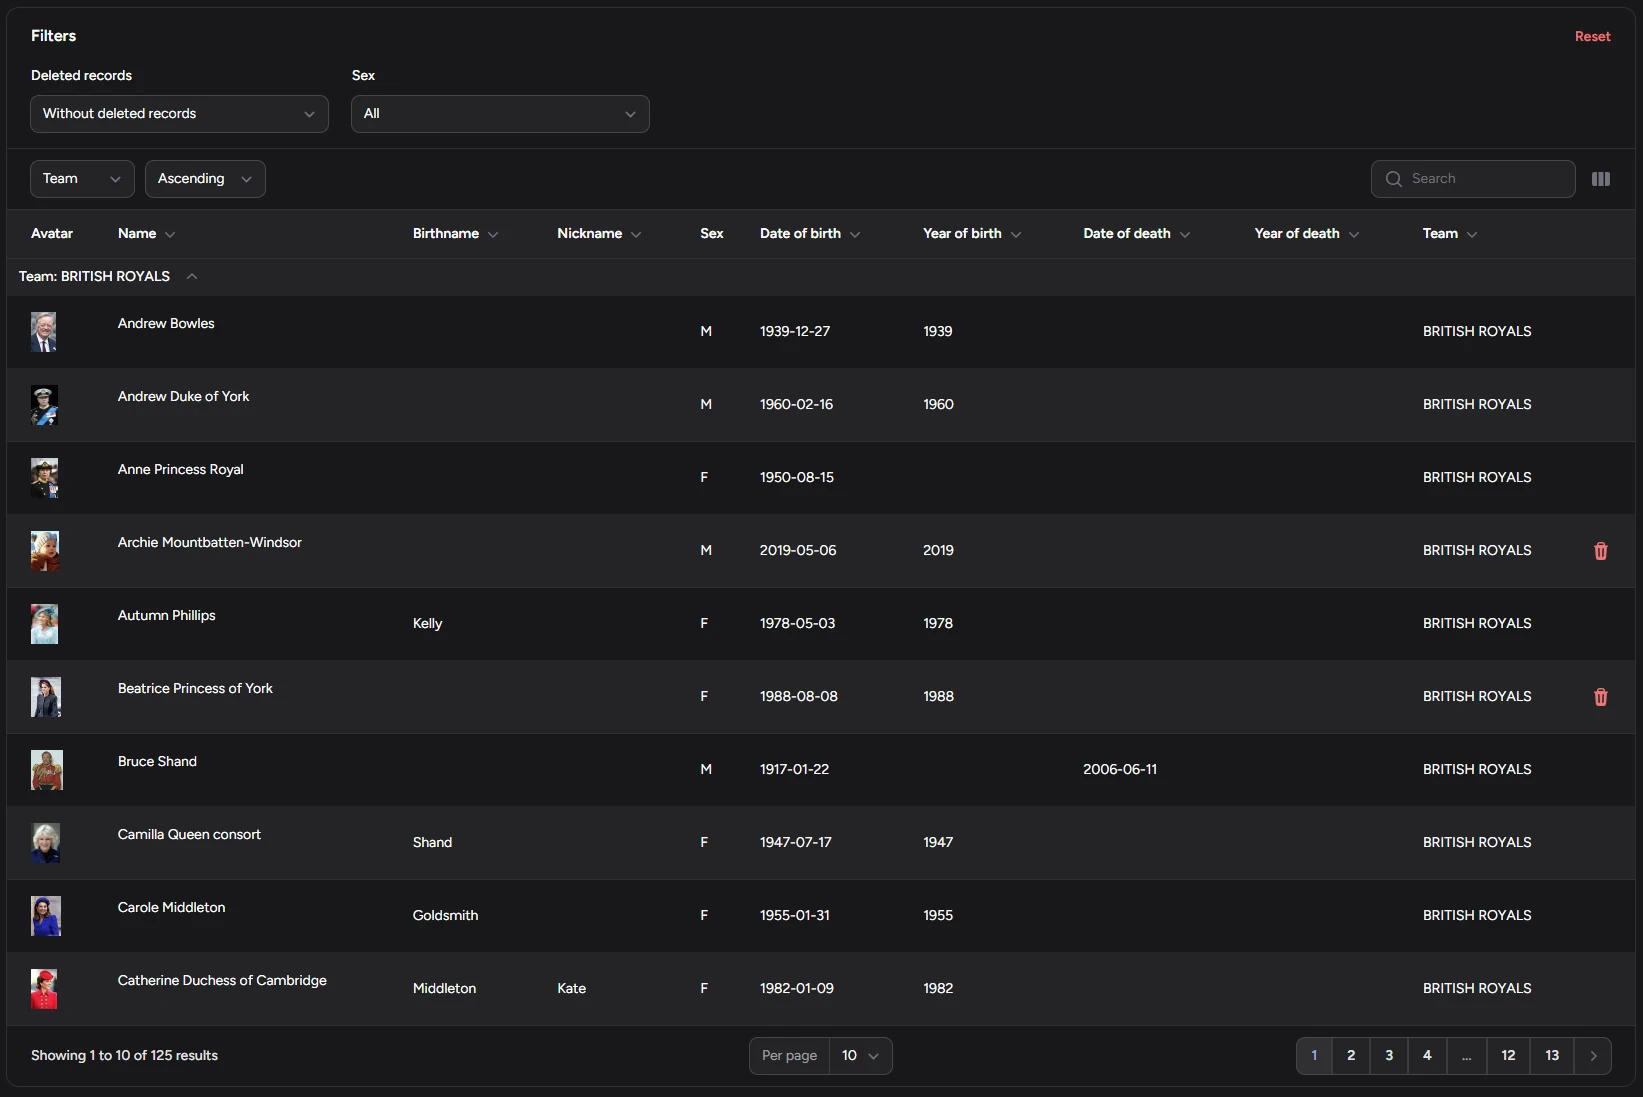
After login and selecting the proper team, click on the Search button in the top navigation menu.

Enter a search value in the search box. You can use the character % as a wildcard character.
Insert either a surname, a firstname, a birthname or a nickname. Do not combine!
Above the search box the number of people available to / found in the current team are shown.
The results are shown in a grid below the search box, each person is represented in one card.
You can use the pagination buttons. You can also change the number of people shown per page.
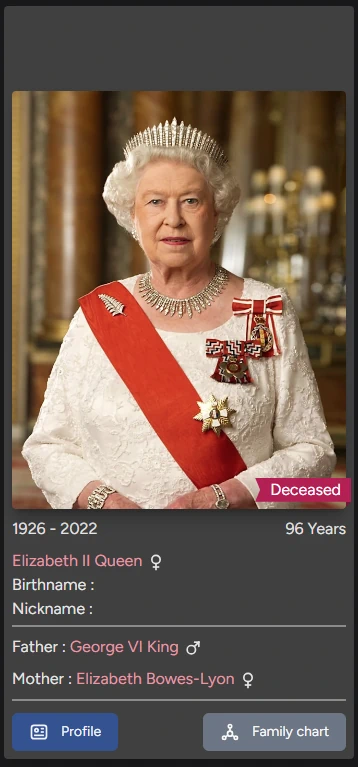
Click on the Profile or Family chart button to see details about that person.
Click on the father's or mother's name to visit the parents.
4. Adding people
a. New person
After login and selecting the proper team, click on the Search button in the top navigation menu.
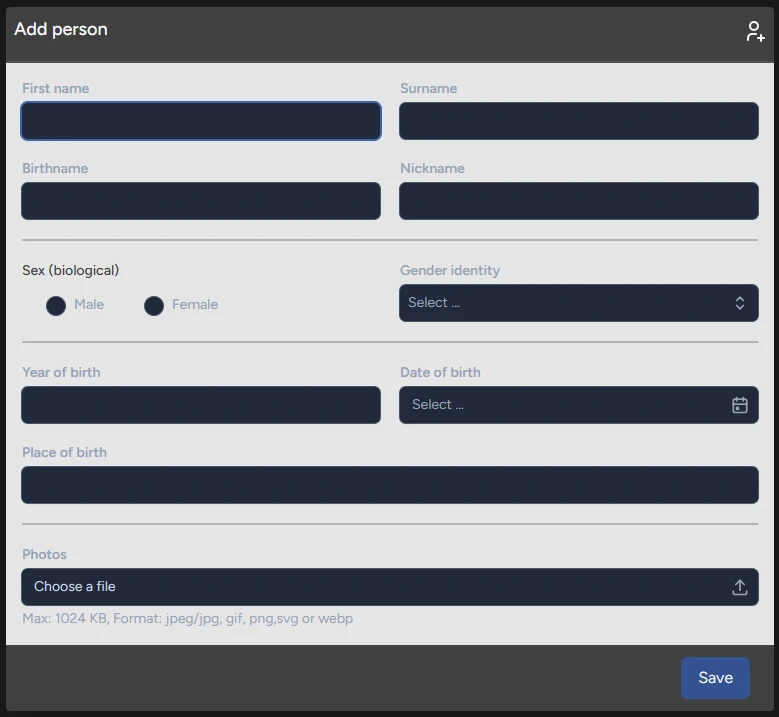
You can add a new person by clicking the Add person button above the search bar.
b. New person being a father or mother
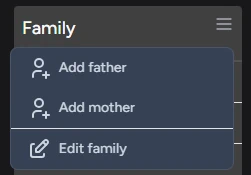
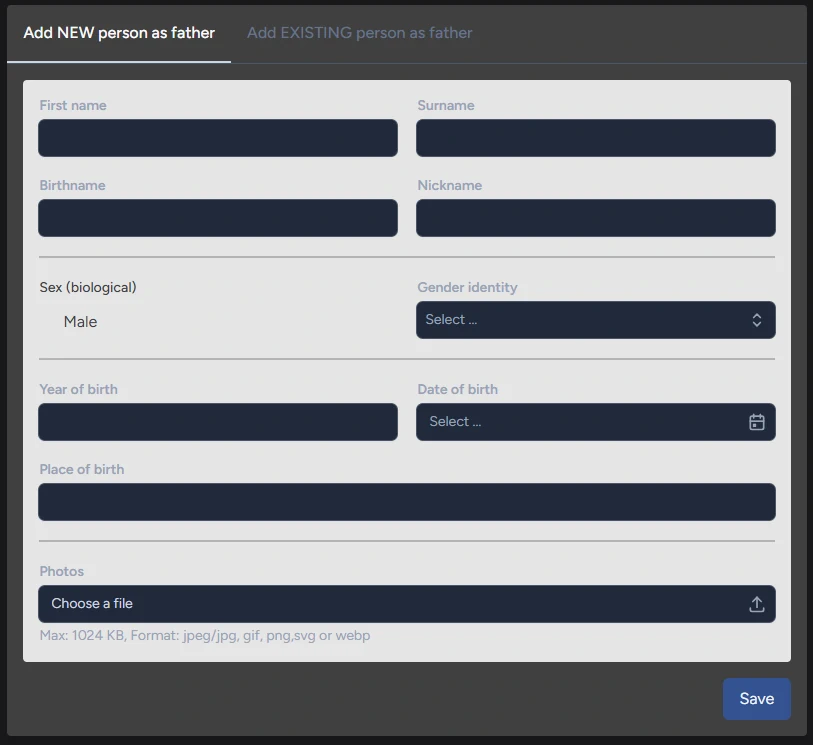
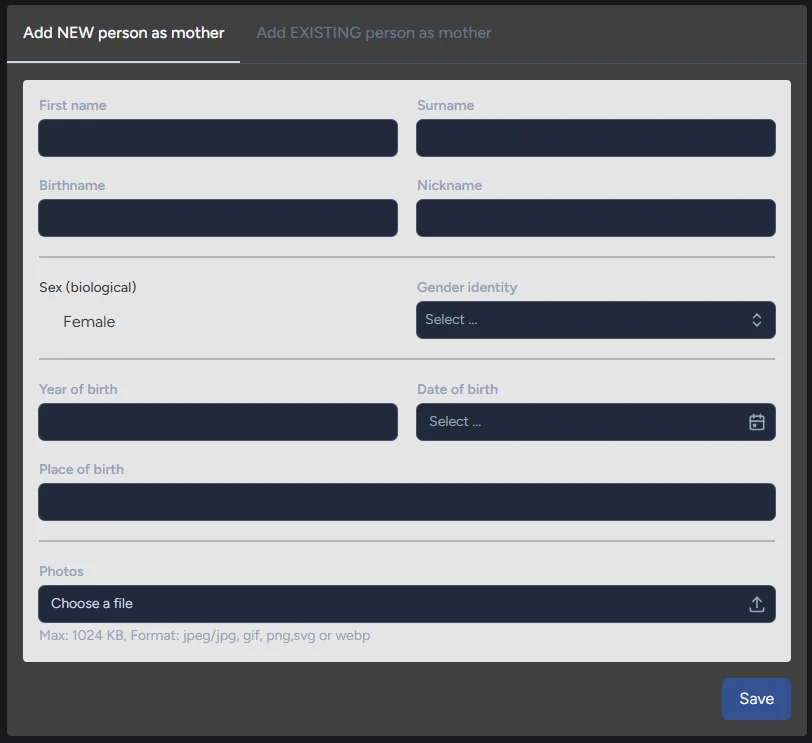
Another way to add people is to click on the Add father or Add mother tab in the Family context menu of an existing person.
These options are only available if the existing person doesn't have a father or mother yet.
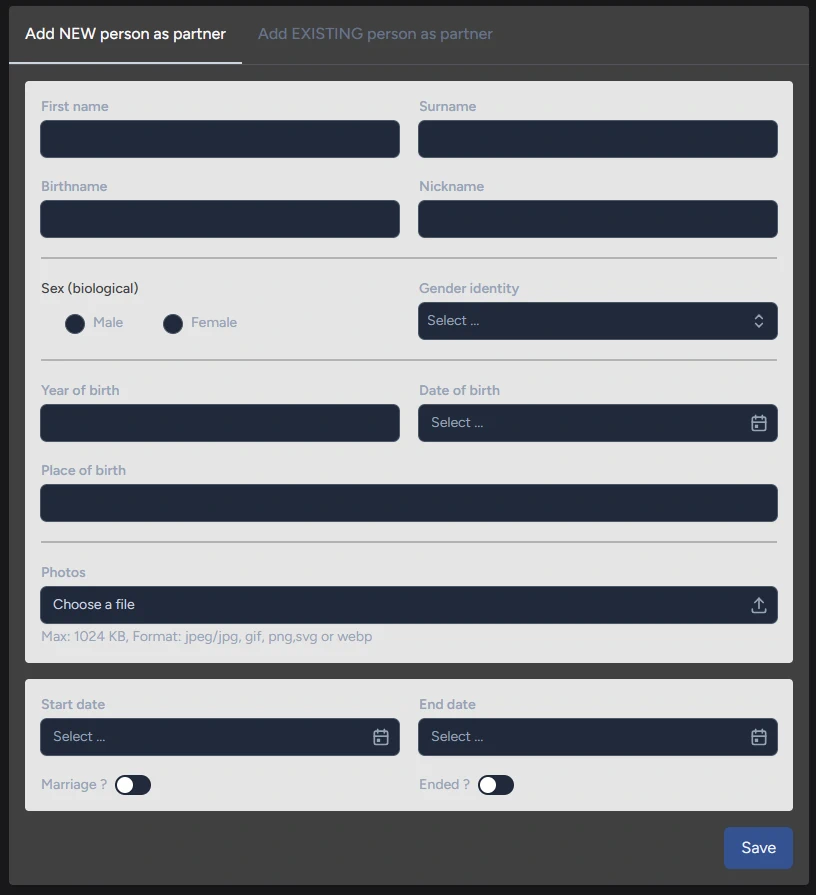
c. New person being a partner
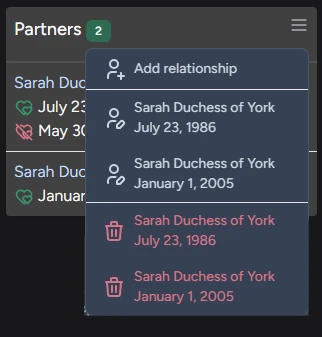
Another way to add people is to click on the Add relationship tab in the Partners context menu of an existing person.
d. New person being a child
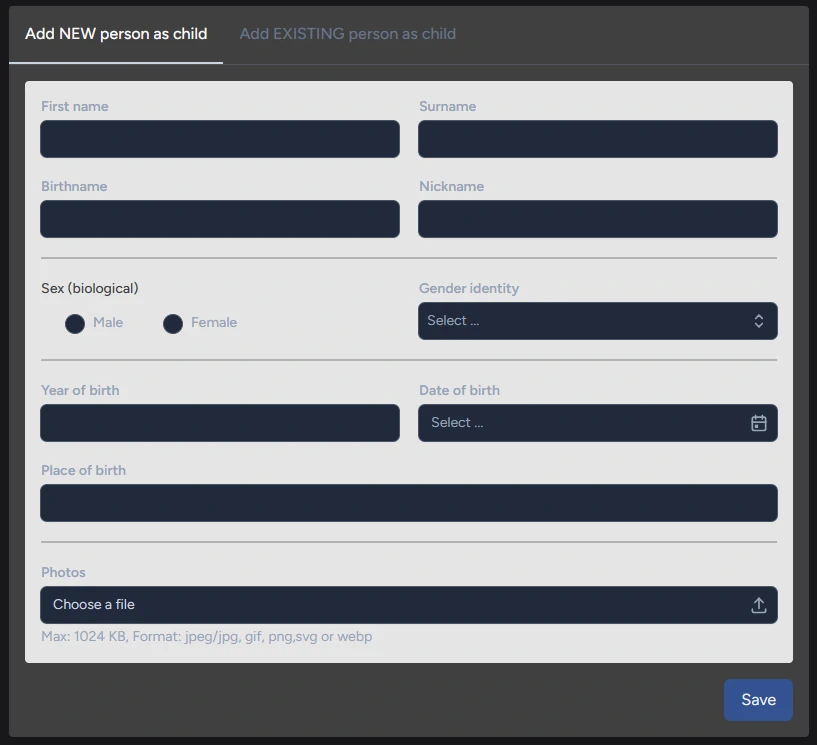
A last way to add people is to click on the Add child tab in the Children context menu of an existing person.

5. Persons and relationships
a. Profile
The personal overview shows all information about the selected person.
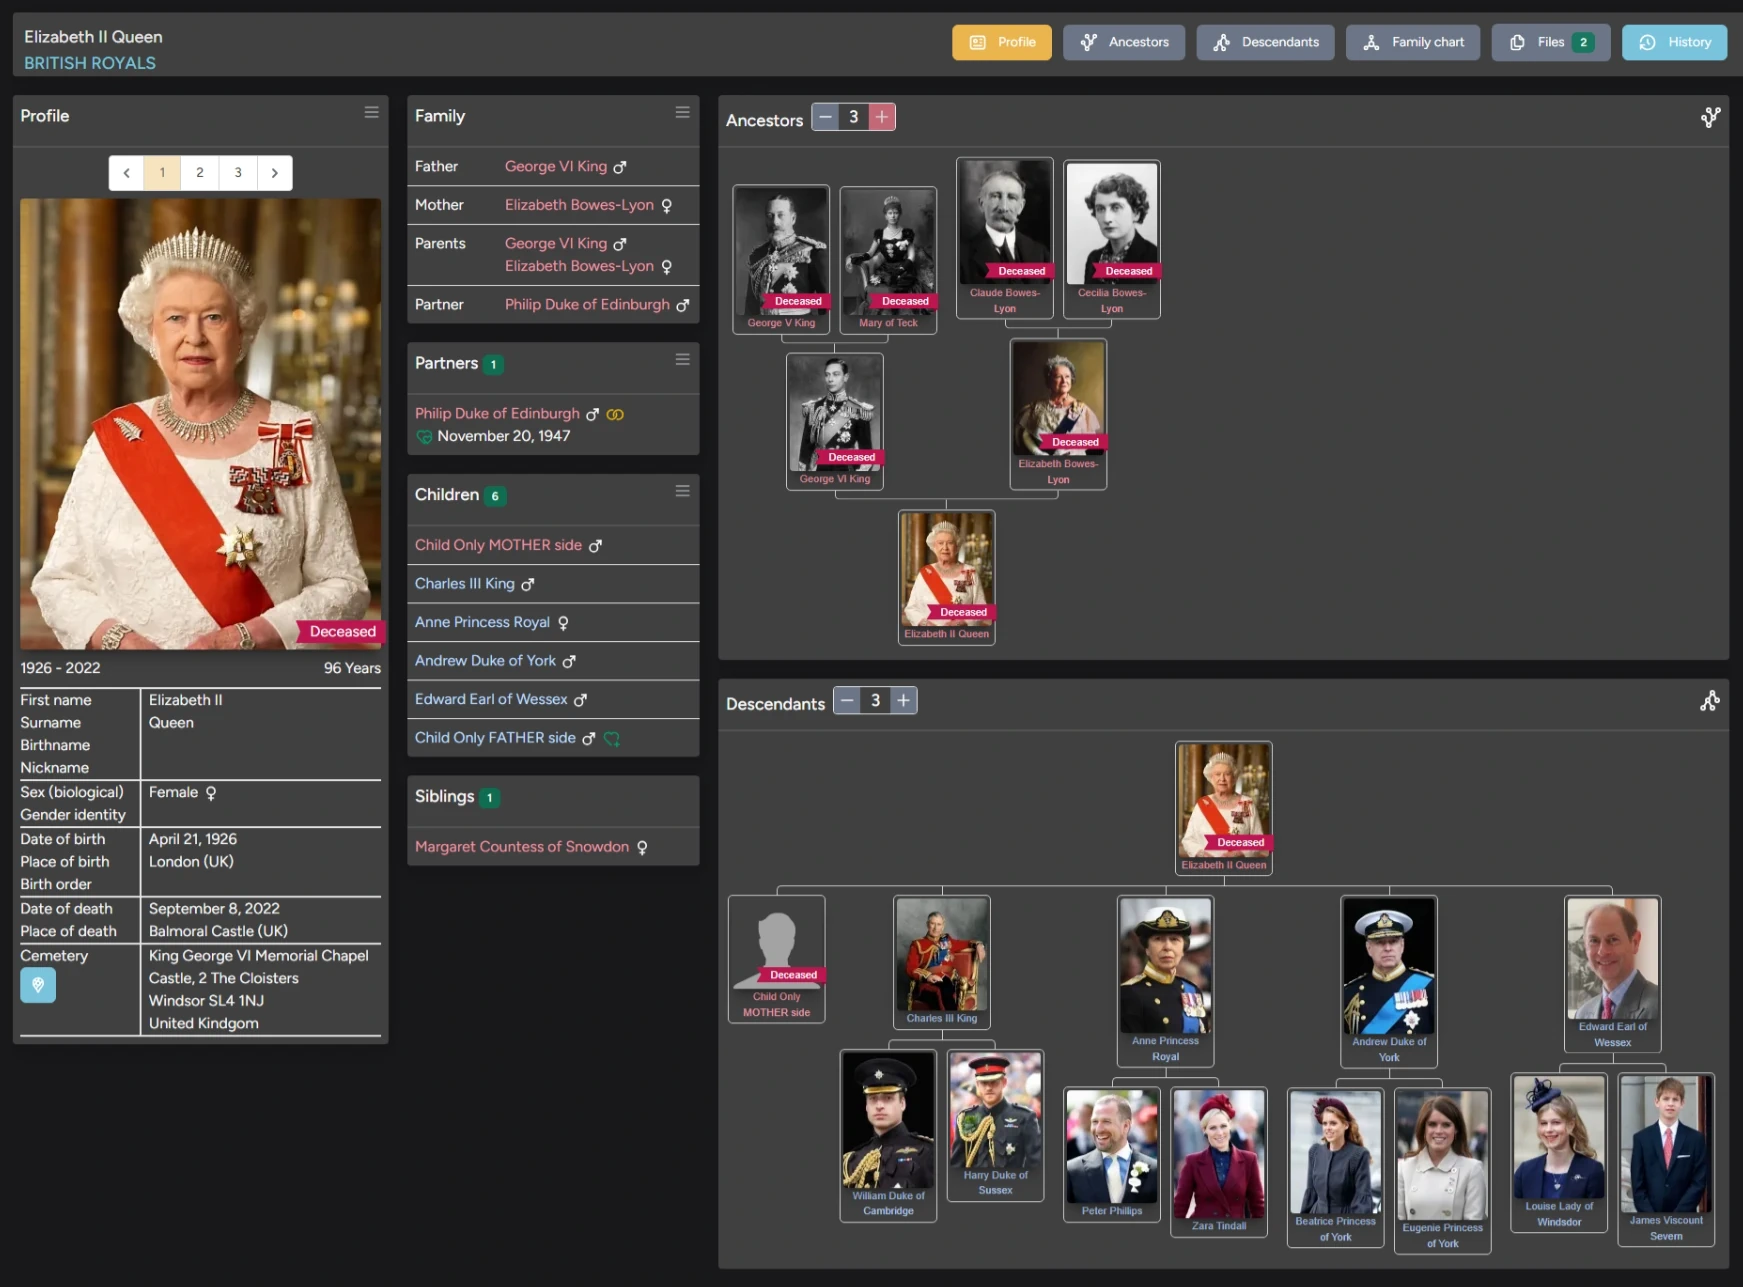
The navigation bar on top allows you to chose some specific items.

The Profile card shows all general information about the person.
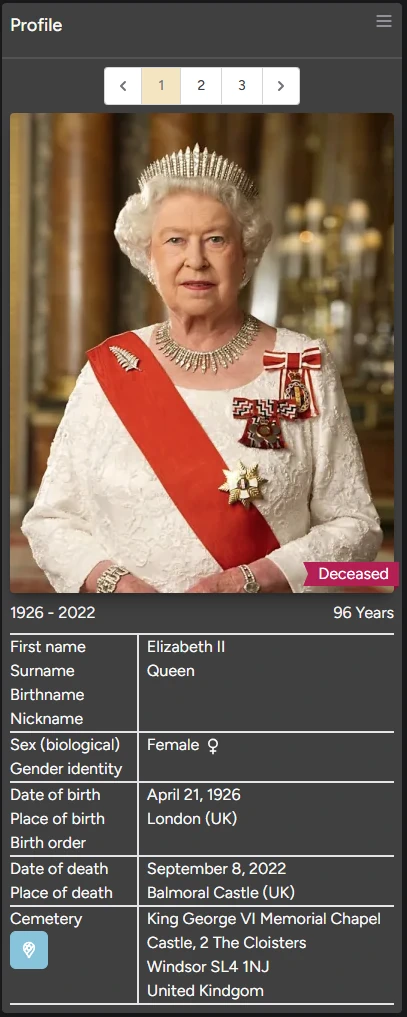
Notice this card shows different data for living and deceased people.
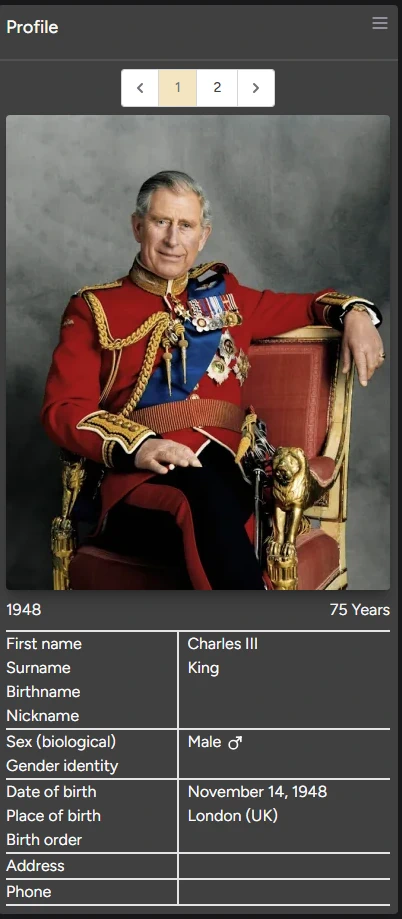
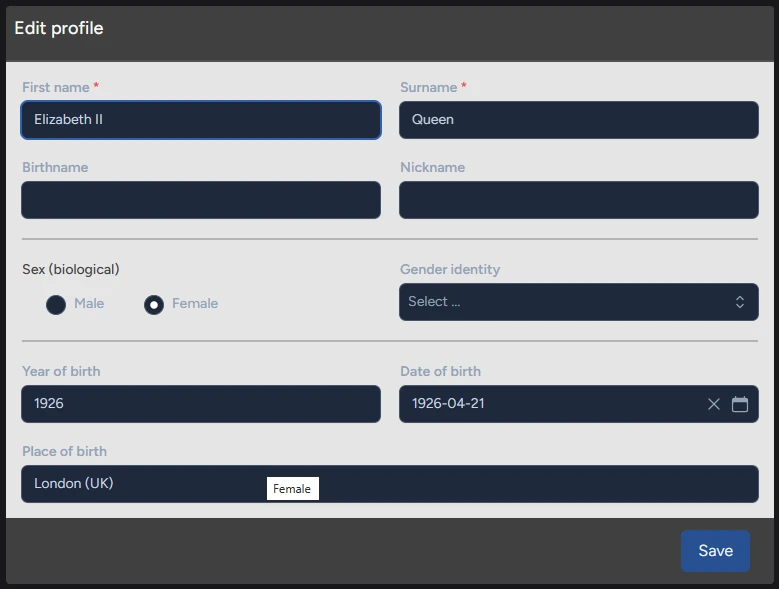
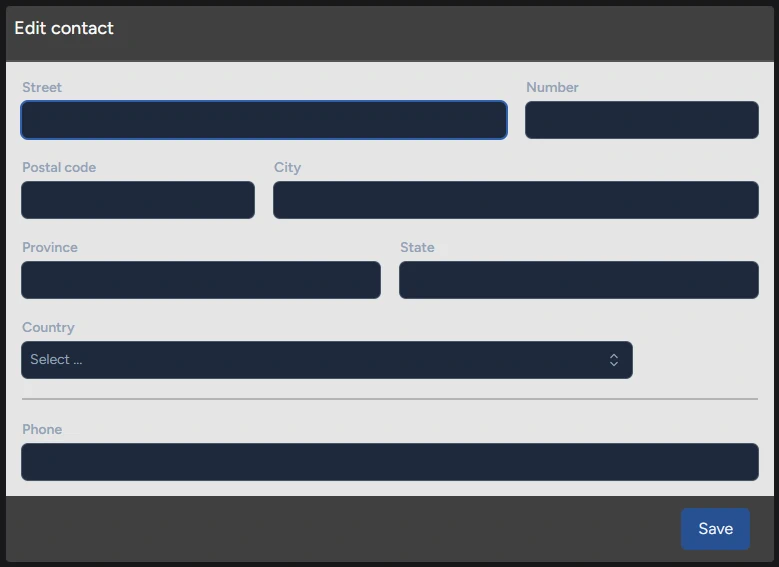
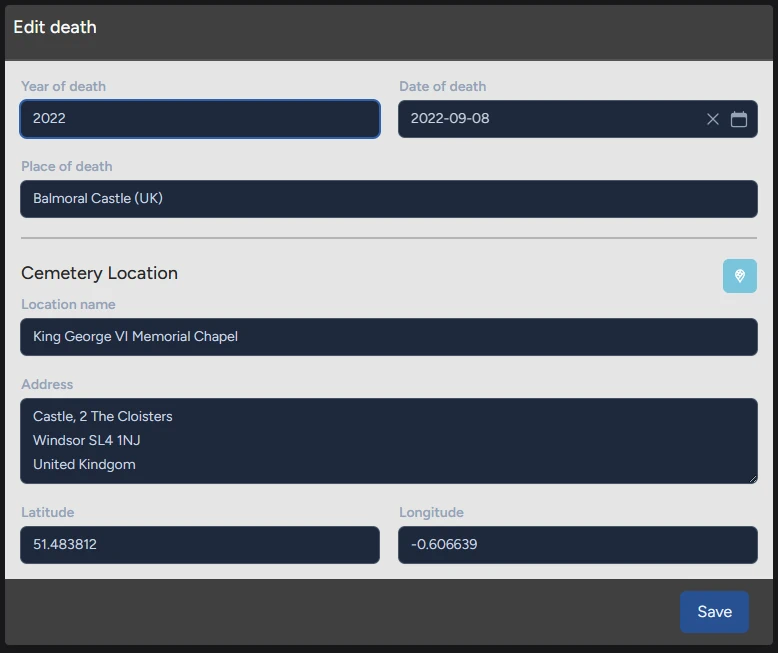
You can edit the profile, contact and death data by choosing the corresponding tab in the context menu.
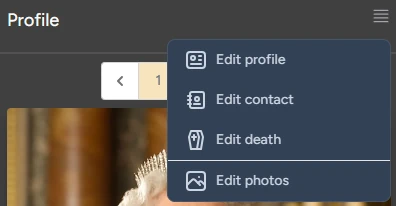
b. Photos
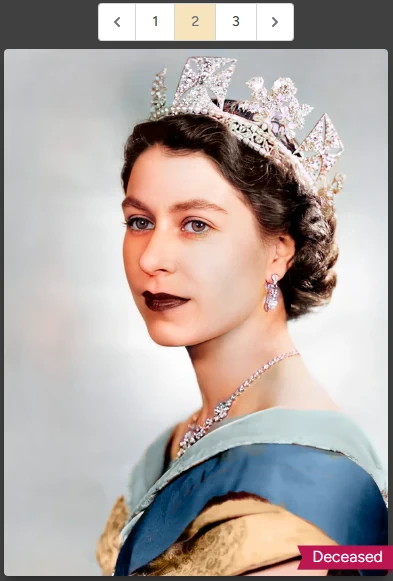
You can browse through the available photos by using the navigation bar above the photo carousel.
You can manage photos by choosing the corresponding tab in the context menu.
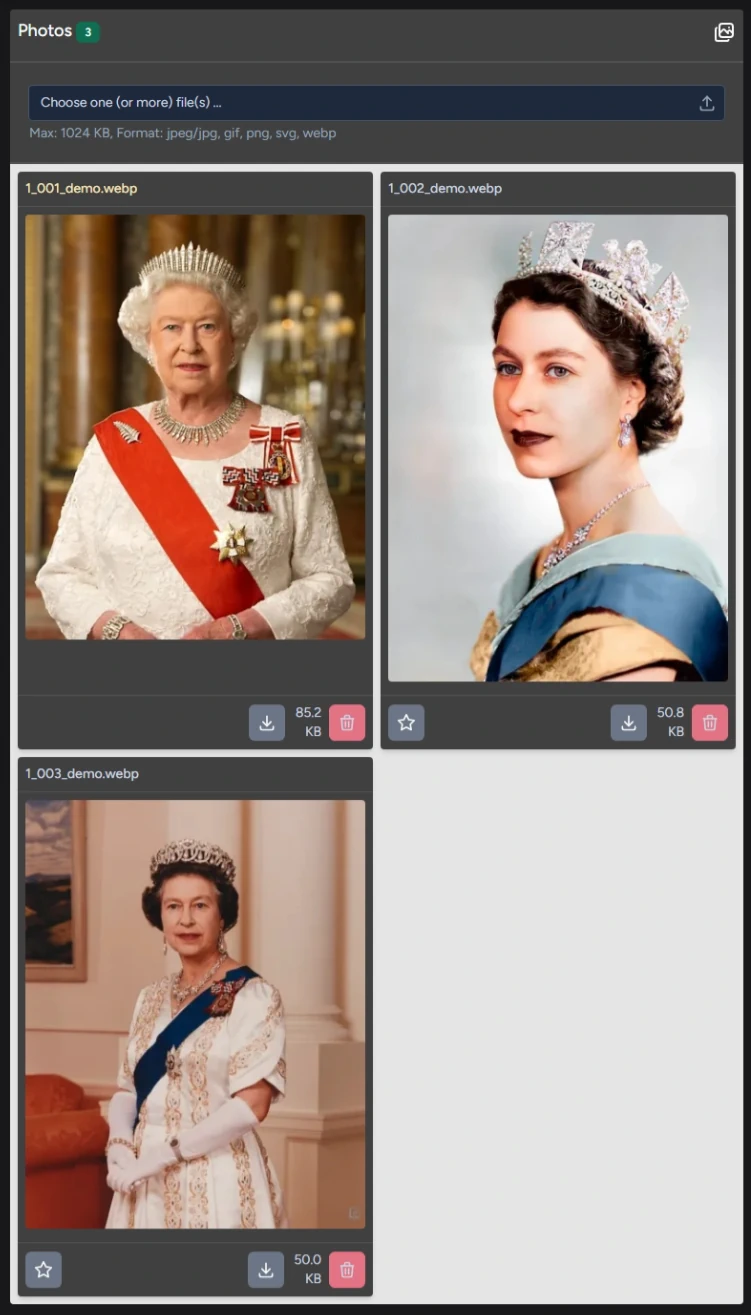
You can upload (multiple) new images.
You can download or delete existing images.
After deleting the primary photo, the first image in the collection wil become the new primary photo.
You can also set the primary image by clicking the Star button.
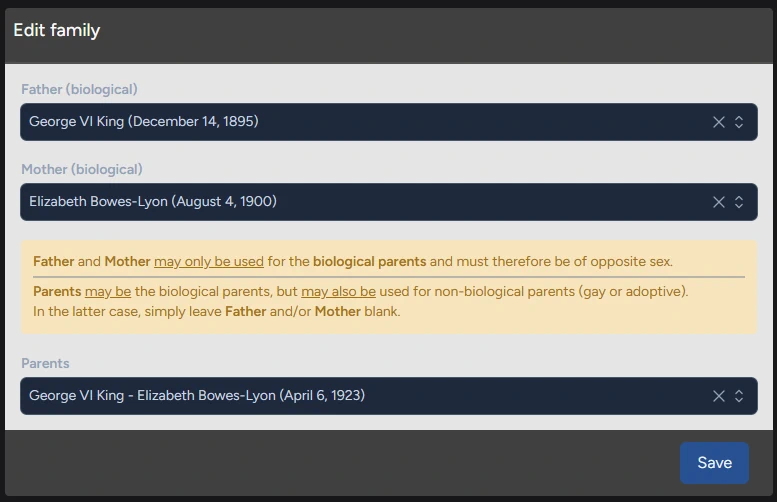
c. Family
The Family card shows the person's parents and the current partner.
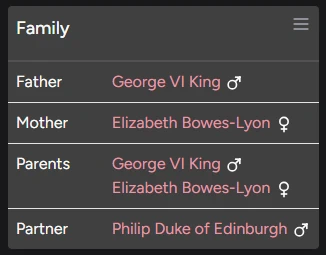
Father and Mother are always referring to the biological father and mother.
Non-biological parent can be defined by the Parents link.
You can edit the family data by selecting the Edit option in the family context menu.
In case the person's father or mother are not yet known, you can add or edit them directly in the family context menu.
d. Partners (Couples)
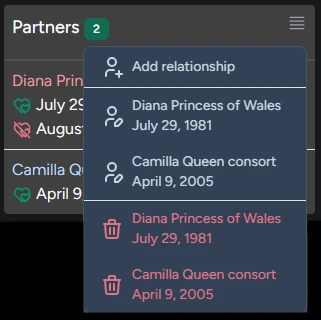
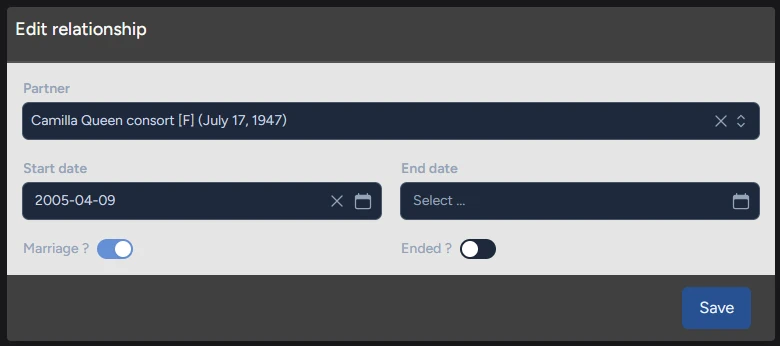
You can add, edit or delete a relationship by choosing the corresponding tab in the context menu. When deleting a relationship, the ex-partner stays in the collection as a separate person. Under normal circumstances, you should only delete relationships when entered by mistake. You can end every exiting relationship by setting the relation as ended, with or without specifying the end date.
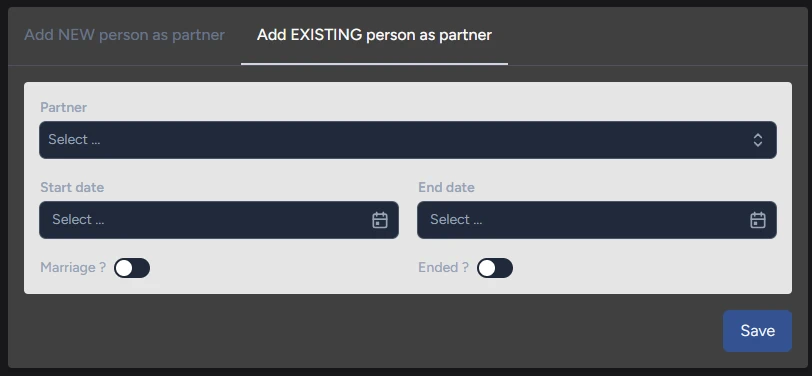
When adding a partner you can either create a brand new person or select an existing person as the new partner.
e. Children
You can add a child or disconnect existing children by choosing the corresponding tab in the context menu. The disconnected child will remain in the database as a person but just not have the selected person as father or mother anymore.
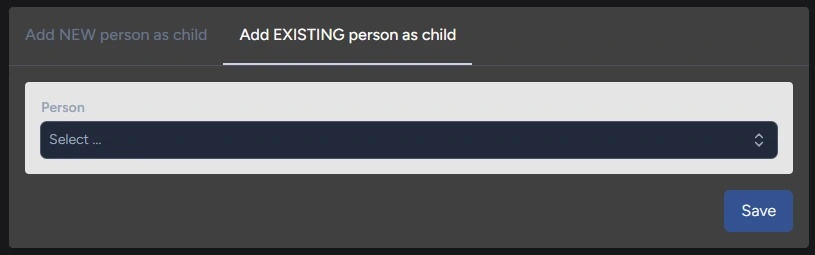
When adding a child you can either create a brand new person or select an existing person.
f. Siblings
Siblings are shown on the siblings card.
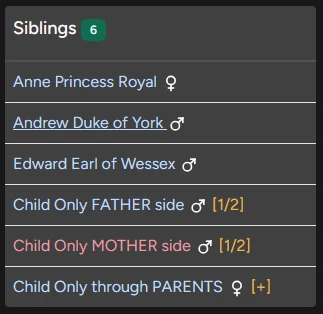
A sibling can be full: both the same biological parents as the selected person.
A sibling can be half: only the biological mother or the biological father are common.
A sibling can be plus: neither the biological father nor the biological mother are common, but the child is part of the current relationship of the selected person
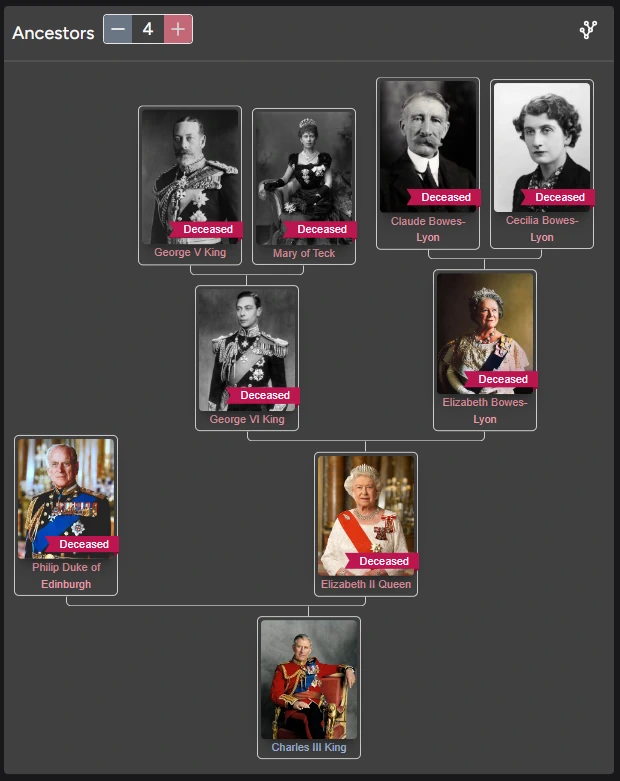
g. Ancestors
This shows the selected person's ancestors.
You can change the tree depth by using the control in the Ancestors card header.
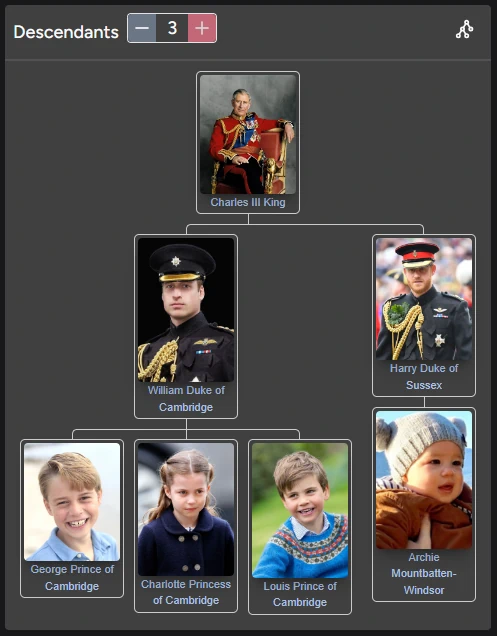
h. Descendants
This shows the selected person's descendants.
You can change the tree depth by using the control in the Descendants card header.
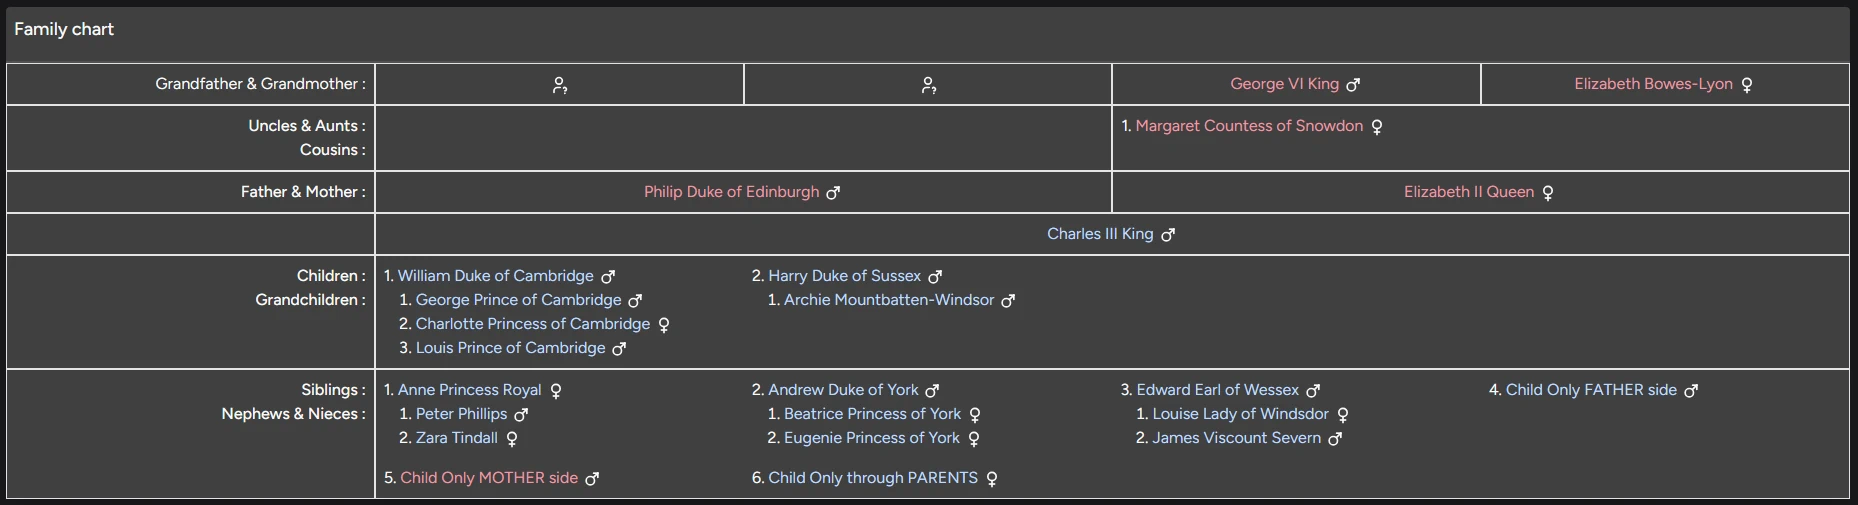
i. Family chart
This shows the compleet family chart, 3 generations deep.
Click on a family member name to see that person's family chart.
j. Files
This shows the files attached to the person.
You can use this feature to attach documentation.
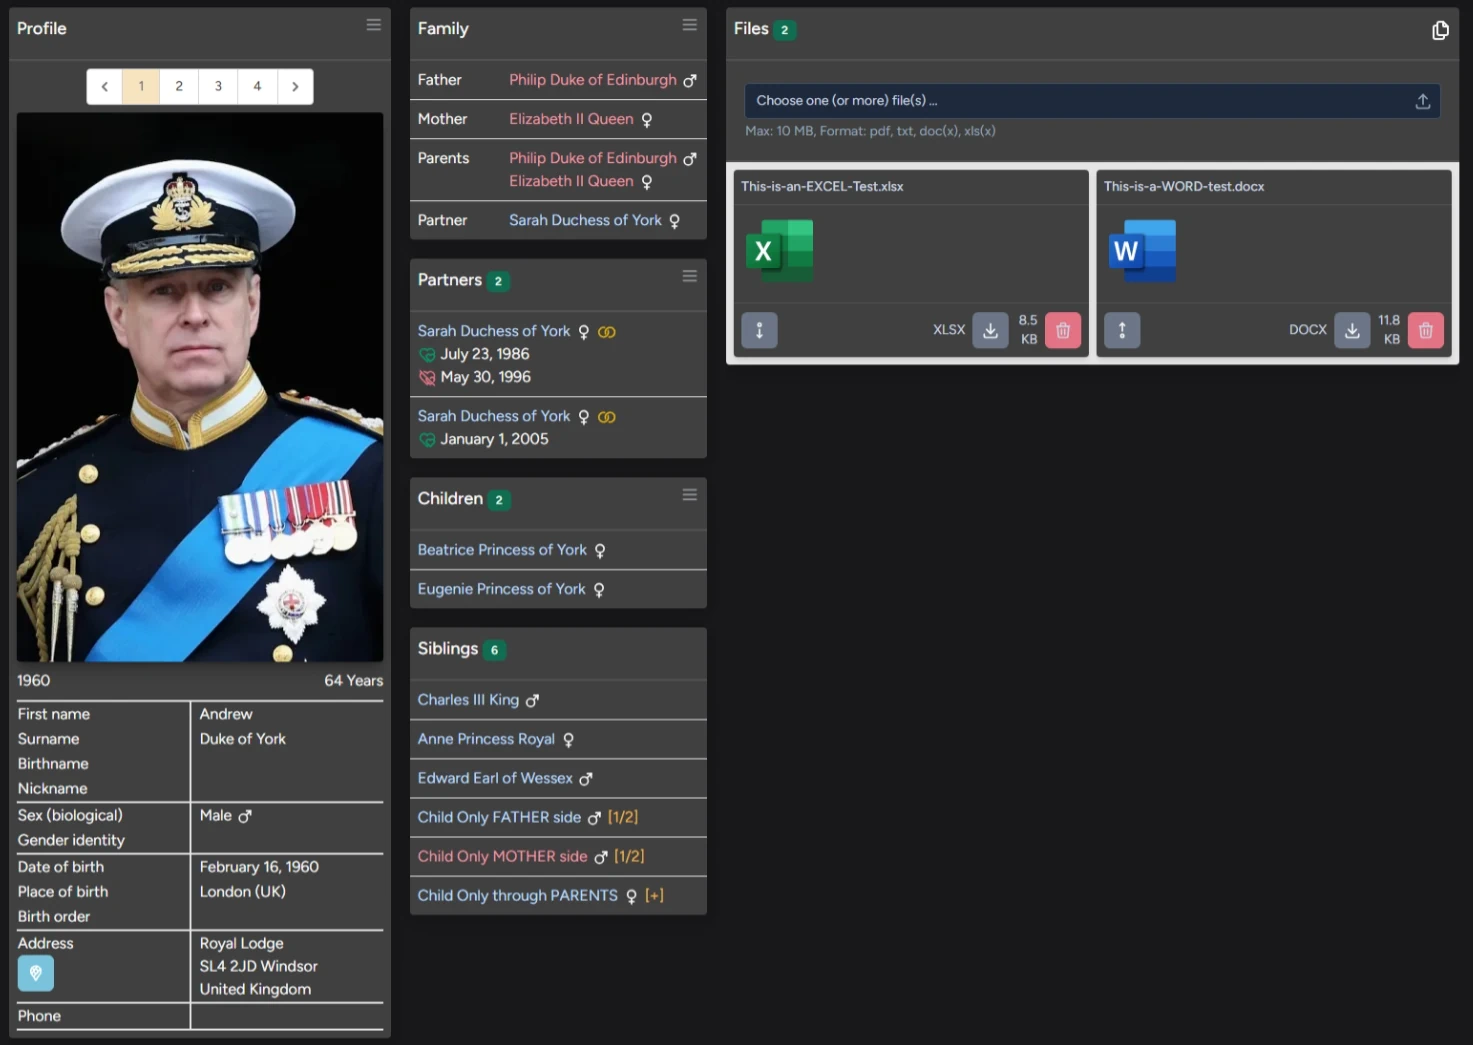
You can upload (multiple) new documents.
You can rearrange the order of the documents by clicking the Up or Down buttons.
You can download documents by clicking the Download button or open them in a seperate window by clicking on the document icon.
You can delete a document by clicking on the Delete button.
k. History
This shows the history of the selected person.

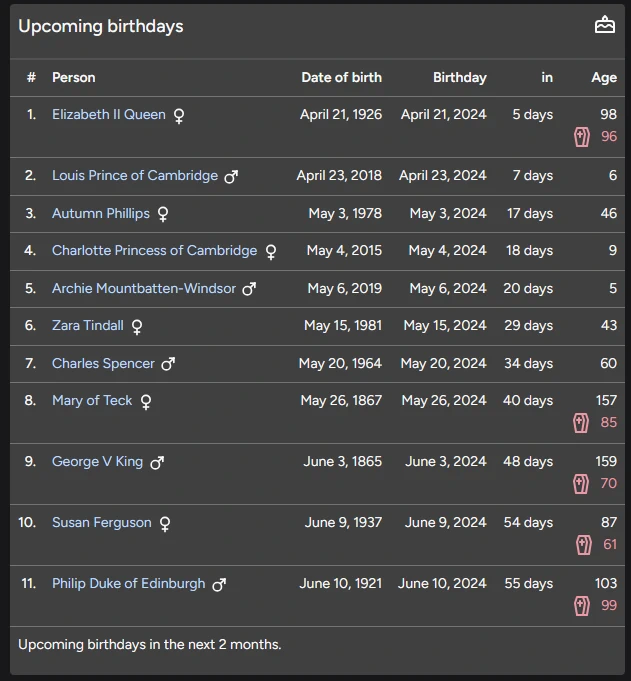
6. Birthdays
After login and selecting the proper team, click on the Birthdays button in the top navigation menu.
This shows the upcomming birthdays.
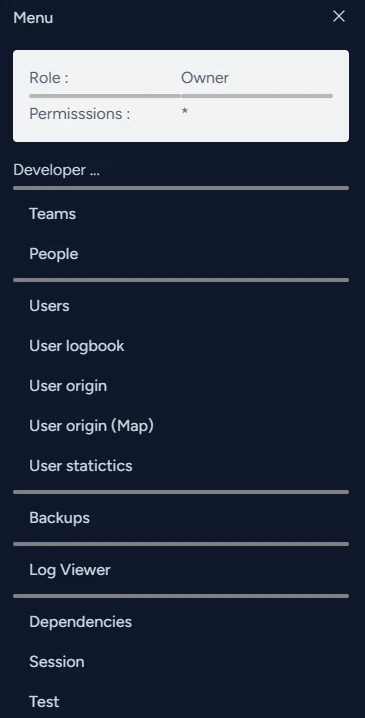
7. Offcanvas menu
Users can click a button in the top right-hand menu to open the offcanvas menu.
On top the users role and permissions in the current team are shown.
If a user has the proper rights, additional features are presented.
a. Teams & people
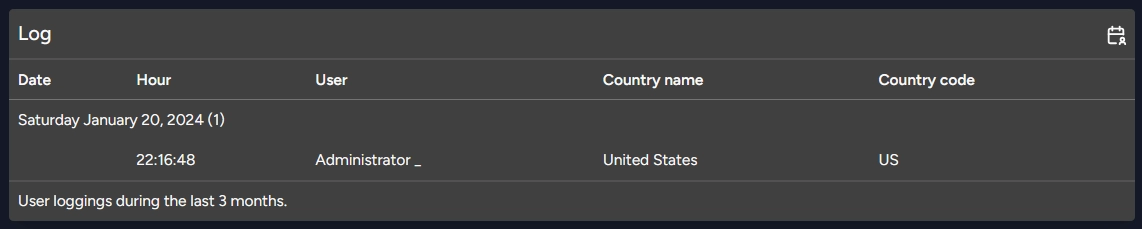
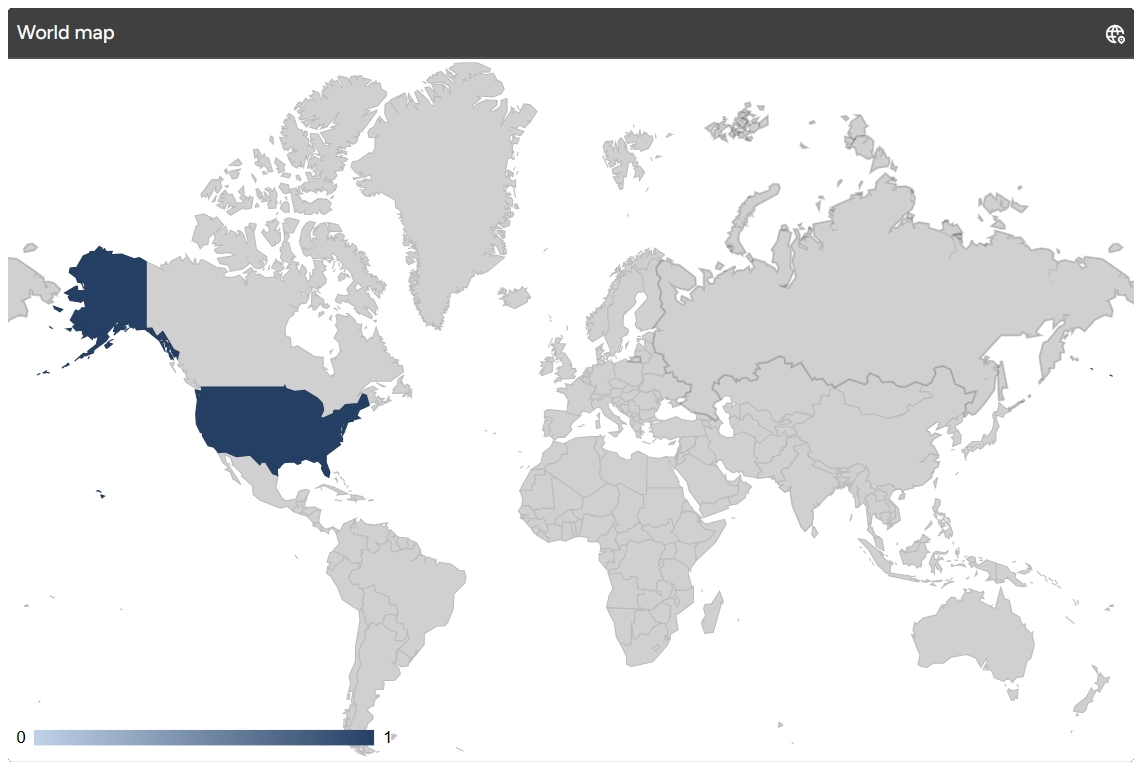
b. Users & logging
The offcanvas menu allows developers to consult the users and their logging information.
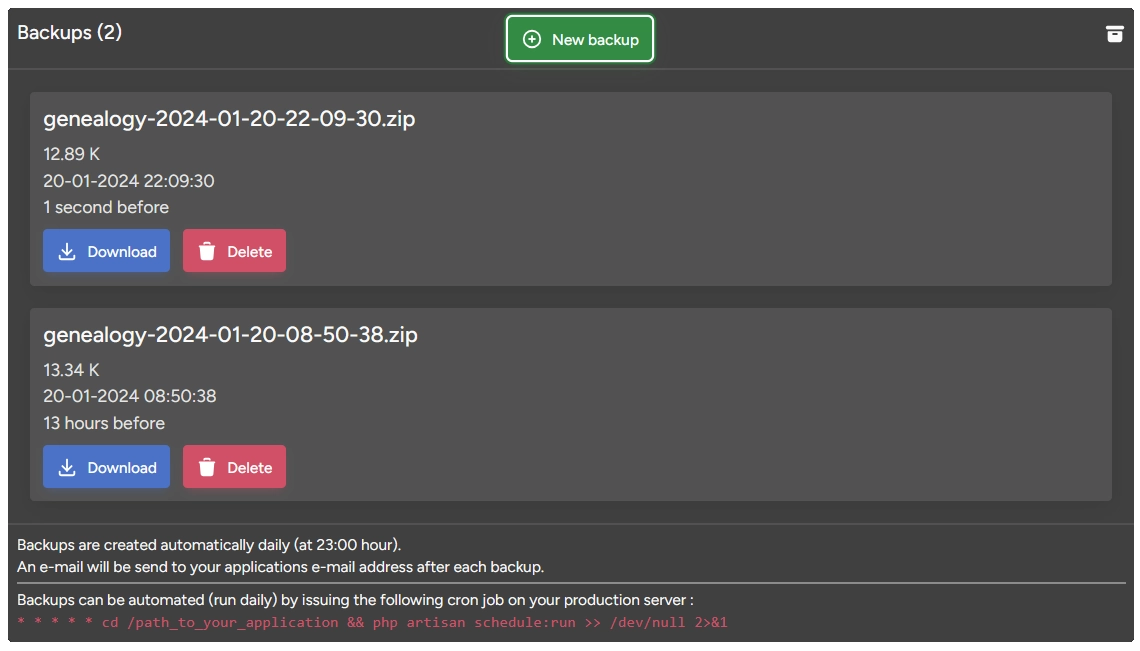
c. Backups
The Backups menu item allows developers to manage database backups.
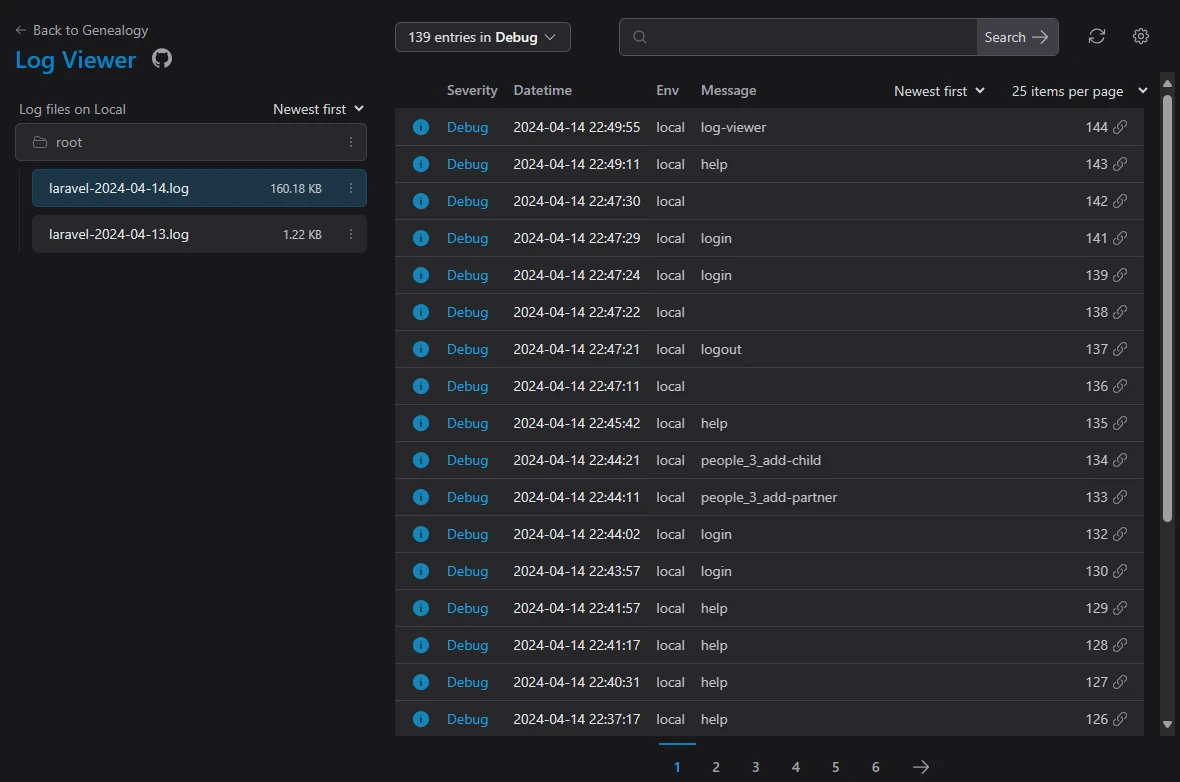
d. Log viewer
The Log Viewer menu item allows developers to consult the application log files.
e. Dependencies
The Dependencies menu item allows developers to consult the application dependencies.
f. Session
The Session menu item allows developers to consult the application session.

8. Language & Timezone
a. Visitors
Visitor can change the language in the top right-hand menu by using the language selector.
De default application language is English.
b. Authenticated users
Authenticated users can change the language and the timezone in the top right-hand menu by using the profile editor.
The selected language and timezone are saved in the database for further use.
9. Color theme
Users can change the color theme in the top right-hand menu by using the theme selector.